Hardwood flooring is a popular choice for homeowners due to its continuity, aesthetic appeal, and the value it adds to a property. Installing hardwood bottoms requires careful planning, the right tools, and a regular approach to insure a smooth and continuing finish. This companion will give an in depth look into the hardwood bottom installation process, from medication to finishing traces, covering essential points similar as material selection, sub-floor medication, installation styles, and conservation tips.
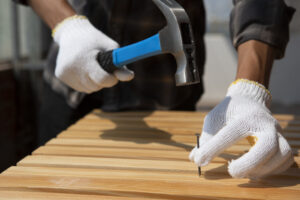
Professional wood floor installation elevates the aesthetic appeal, durability, and overall value of any space. Hiring experienced experts guarantees precise craftsmanship, long-lasting performance, and a seamless finish that complements your style.
1. Choosing the Right Hardwood Flooring
Before beginning the installation process, it’s pivotal to choose the right type of hardwood flooring that suits your home and life. Hardwood bottoms come in two primary types solid hardwood and finagled hardwood. Solid Hardwood Made from a single piece of wood, solid hardwood can be filed and refinished multiple times, making it largely durable. It’s available in colorful wood species similar as oak, maple, walnut, and cherry. Engineered Hardwood Composed of multiple layers of wood with a top sub-caste of hardwood veneer, finagled hardwood is more resistant to humidity and temperature oscillations, making it ideal for basements and sticky climates. Wood Species Different wood species offer varying situations of hardness, grain patterns, and colors. For illustration, oak is known for its continuity, while walnut has a rich, dark tone. Plank Size and Finish Hardwood flooring comes in different plank sizes and homestretches, including predefined and untreated options. Predefined wood has a plant applied defensive coating, while untreated wood allows for a custom stain and finish after installation.
2. Preparing for Installation
Proper medication is essential for a successful hardwood bottom installation. The following way insure the sub-floor is ready and conditions are optimal for installation Acclimatization Hardwood flooring must be shaped to the room’s temperature and moisture situations before installation. Store the wood planks in the installation area for at least 72 hours to help expansion or compression after installation.Sub-floor Inspection The sub-floor must be clean, dry, and position. Common sub-floor accoutrements include plywood, concrete, and being wood flooring. Any irregularities, similar as dips or bumps, should be corrected to help uneven installation. humidity hedge If installing hardwood over concrete or in humidity-prone areas, use a vapor hedge to help humidity related issues like screwing and cupping.Gathering Tools and Accoutrements Essential tools for hardwood bottom installation include a tape recording measure, chalk line, pry bar, nail gun, saw, spacers, and safety gear.
3. Installation styles
There are several styles for installing hardwood flooring, depending on the type of wood and sub-floor Nail Down system This system is generally used for solid hardwood and involves securing the planks to a rustic sub-floor using nails or masses. It provides a stable and long lasting installation but requires experience in using a flooring naiver. Cohere Down Method Engineered hardwood is frequently installed using a cement down system, where glue is applied to the sub-floor before placing the planks. This system works well over concrete sub-floors. Floating Floor Method In this system, the hardwood planks are not attached to the sub-floor but rather interlock using a lingo and groove system. This fashion is ideal for finagled hardwood and allows for expansion and compression. chief Down system analogous to the nail-down system, but using masses rather of nails. It’s a quick and secure way to install hardwood over plywood sub-floors.
Wait : The cost to install hardwood floors depends on materials, labor, and location. While the price varies, hardwood flooring adds beauty, durability, and value to any home.
4. Step by Step Installation Process
Follow these way to install hardwood flooring successfully
Step 1 Layout Planning Determine the direction of the planks, generally resemblance to the longest wall or in the direction of natural light. Use a chalk line to mark reference points.
Step 2 First Row Installation Begin by placing spacers along the walls to allow for expansion gaps. Secure the first row of planks using nails, cement, or floating system, icing they’re aligned duly.
Step 3 Continuing the Installation Stagger the joints to produce a natural and stable pattern. Use a flooring naiver or glue as demanded while maintaining harmonious distance.
Step 4 Cutting Planks Use a aphorism to trim planks as necessary, icing a snug fit around obstacles like doorways and reflections.
Step 5 Final Rows The last row may bear trouncing to fit duly. Use a pry bar to position the planks tightly against the former row.
Step 6 Removing Spacers and Finishing Touches Once all planks are installed, remove spacers and install baseboards or quarter round molding to cover expansion gaps.
5. Post Installation conservation and Care
To maintain the beauty and life of hardwood bottoms, follow these conservation tips Regular drawing reach or vacuum regularly to remove dust and debris. Use a damp( not wet) mop with a woodsafe cleanser for deeper cleaning. Avoid Water Damage Wipe up tumbles incontinent to help humidity from percolating into the wood. Use Furniture Pads Place felt pads under cabinetwork legs to help scrapes and dents. Control moisture situations Maintain inner moisture situations between 35 and 55 to minimize wood expansion and compression. Refinishing Over time, hardwood bottoms may bear sanding and refinishing to restore their original look.
Conclusion
Hardwood bottom installation is a satisfying design that enhances the aesthetics and value of a home. With proper planning, medication, and prosecution, homeowners can achieve a professional quality installation that lasts for times. By opting the right hardwood, preparing the sub-floor, using the applicable installation system, and maintaining the bottom duly, one can enjoy the dateless beauty and continuity of hardwood flooring for generations.