preface
Hardwood flooring adds fineness, continuity, and value to a home. Its dateless appeal and capability to enhance interior aesthetics make it a popular choice for homeowners. still, proper installation is crucial to icing life and optimal performance. This companion provides a comprehensive overview of hardwood bottom installation, covering types of hardwood flooring, medication, installation styles, tools, and conservation tips
Proper floor maintenance and care are essential for preserving the beauty, durability, and longevity of your flooring..
Types of Hardwood Flooring
Before installation, it’s important to choose the right type of hardwood flooring grounded on aesthetics, continuity, and installation conditions. The two primary types of hardwood flooring are
1. Solid Hardwood Flooring
Made from a single piece of hardwood. can be filed and refinished multiple times. Sensitive to humidity and moisture changes.generally installed using nails or masses.
2. Engineered Hardwood Flooring
Composed of a real wood veneer over plywood or fiberboard layers. further resistant to humidity and temperature oscillations.Can be installed using floating, cement down, or nail down styles. lower room for refinishing compared to solid hardwood.
PreInstallation Preparation
Proper medication is pivotal to insure a successful hardwood bottom installation.
1. Measuring and Ordering Accoutrements
Measure the room confines to calculate the square footage. Order 5 10 redundant flooring to regard for waste and cutting crimes.
2. fashioning the Hardwood
Store the hardwood planks in the installation area for at least 3 5 days. Maintain room temperature between 60 80 °F and moisture situations between 30 50. mound planks with space in between for air rotation.
3. Preparing the Sub floor
insure the sub floor is clean, dry, and position. Remove old flooring, nails, and debris. Check for humidity situations using a humidity cadence.If necessary, install a vapor hedge to help humidity damage.
Tools and Accoutrements demanded
Tape recording measure Chalk line humidity cadence Nail gun or chief gun glue( for cement down installations) Underpayment( for floating installations) Pry bar Spacers indirect aphorism or table saw Rubber mallet Wood padding Sandpaper bottom nailer( for nail down installations)
Note: Hiring a professional hardwood floor installer ensures precise and durable flooring installation. Proper installation prevents issues like uneven surfaces or gaps, enhancing both aesthetics and stability.
Installation styles
There are three primary installation styles for hardwood flooring
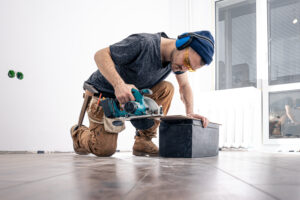
1. Nail Down Installation( For Solid Hardwood)
Ideal for plywood sub floors.Start in a straight line along the longest wall.Use a curvaceous nailed or chief gun to secure planks.Leave expansion gaps of about 3/8 inch around the room border. Continue laying boards in a staggered pattern.
2. Cohere Down Installation( For Engineered Hardwood)
Suitable for concrete sub floors.Apply a high quality wood glue with a trowel.Place each plank into the glue, pressing forcefully. Use spacers to maintain expansion gaps.Avoid walking on the bottom for at least 24 hours to allow proper cling.
3. Floating bottom Installation( For Engineered Hardwood and Click Lock Systems)
Uses an interlocking medium that does not bear nails or cement.Install an underpayment to give bumper and humidity protection. Click planks together, icing a snug fit. rim the last row to fit using a indirect aphorism.
Post Installation Finishing
After installation, follow these way for optimal results Remove spacers and install baseboards or quarter round moldings to cover expansion gaps. check the bottom for gaps or uneven areas. Clean the face with a soft broom or vacuum. Apply a defensive finish if using untreated hardwood.
Common miscalculations to Avoid
Skipping Acclimatization Can lead to screwing or revulsion.Ignoring Expansion Gaps Wood needs room to expand and contract.Uneven Sub floor Can affect in an unstable bottom. Incorrect Adhesive Use Choosing the wrong glue can weaken the bond.Failing to Stagger Joints Creates a weak structure and unpleasing look.
conservation Tips for Hardwood bottoms
To maintain the beauty and life of hardwood bottoms Use cabinetwork pads to help scrapes. reach and vacuum regularly to remove dirt and debris.Wipe tumbles incontinent to avoid humidity damage.Use area hairpieces in high business areas.Avoid inordinate water exposure when drawing. Re coat or refinish periodically to restore shine and continuity.
Conclusion
Hardwood bottom installation requires careful planning, the right tools, and precise ways to insure a beautiful and long continuing result. Whether using a nail down, cement down, or floating system, attention to detail is crucial. By following proper installation and conservation guidelines, homeowners can enjoy the dateless fineness of hardwood flooring for times to come.